
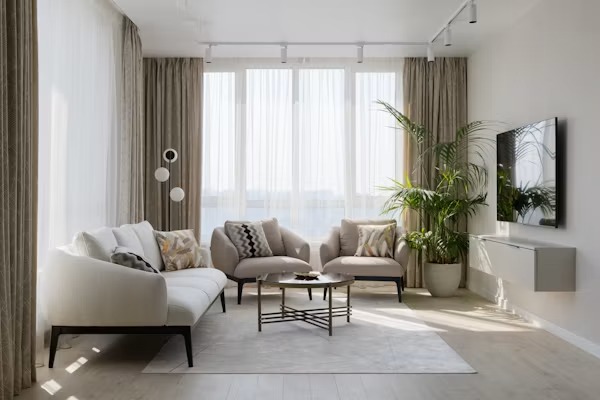
A First-Timer's Guide to Your First Interior Project in Pune
The most expensive weeks of a first interior project are the ones before anybody has been appointed. That is when a first-time owner takes possession without checking anything, pays a token to a carpenter a relative recommended, agrees a lump-sum figure with no specification behind it, and asks for the kitchen to start because the family is moving in six weeks. Everything after that is damage control.
Nobody warns you, because the industry is set up to start selling at the point you already have a plan. The truth is that the decisions that determine whether your project runs well are boring and early: what you check at possession, how you set a budget, what your society requires, and what is written down before the first payment leaves your account.
This guide walks the whole journey in order. Each stage links to a deeper piece where the detail sits, so treat this page as the map rather than the manual.
Stage 1: Possession, before you take the keys
Possession is a checkpoint, not a formality. Once you have signed, defects in the builder's work quietly become your interior budget. Walk the flat with a torch and a spirit level: check floor and wall levels, tile hollowness, door and window operation, water pressure and drainage in every wet area, the position and count of electrical points, the distribution board, and any dampness on external walls.
Also check what the builder will and will not change. Some changes, a shifted socket, a different tile, an extra plumbing point, are far cheaper before handover than after. The full list of what to settle at this point is in our guide on what to finalise before flat possession.
Timing matters here in a way first-time buyers rarely anticipate. In towers around Punawale and Ravet, dozens of flats take possession within the same few months, which means dozens of fit-outs competing for the same service lift, the same debris slots and the same working hours. Being early in that queue is worth real weeks.
Stage 2: Set the budget before you set the taste
Do this before you look at a single reference image, because images are how budgets get lost. Work out what you can spend in total, then split it: interiors, appliances, furniture and soft furnishings, and a contingency of 12 to 15 per cent that you do not touch.
To sanity-check the interiors number, use published ranges rather than a quote. Residential fit-outs in Pune typically run ₹1,300 to ₹1,900 per sq ft for essential work, ₹2,000 to ₹3,000 for mid-range and ₹3,200 to ₹6,000 or more for premium. A 2 BHK commonly lands between ₹7.5 lakh and ₹24 lakh depending on which of those bands you are in. The cost per sq ft guide explains what moves a project between bands, and the 2 BHK cost guide for Pimpri-Chinchwad breaks a typical scope down room by room.
Then decide your priorities honestly. Nearly every first project has to choose. Kitchen and wardrobes are the items you use daily and the hardest to redo later, so they usually deserve the money. Feature walls, elaborate ceilings and statement furniture can be added in year three without disruption.
Fix the scope before you compare prices. Two quotations for "2 BHK interiors" can differ by eight lakh and both be honest, because they are for different work. Compare specifications, not totals.
Stage 3: Decide how the work will be delivered
There are broadly three routes. You appoint a designer for drawings and manage contractors yourself. You appoint a contractor and design as you go. Or you appoint one party turnkey, design and execution together, with a single point of accountability.
Each has a real trade-off. Self-managing is cheapest on paper and expensive in time, coordination and rework, and it puts every gap between trades on you. A contractor-led job moves fast and tends to produce whatever the contractor has built before. Turnkey costs more per rupee of joinery and absorbs the coordination, which for a first-timer with a job is usually where the value sits. The honest comparison is in our guide on turnkey interiors versus a contractor, and the case for the single-party route is set out in why turnkey works for modern homes.
Stage 4: Choosing who you work with
This is the decision that determines the other ninety. Meet at least three studios. Ask each one what is excluded from their quotation, how variations are priced, who supervises the site day to day, and what happens if a material is unavailable mid-project. The answers will separate them faster than a portfolio will.
Look at completed work rather than renders, and speak to a past client if you can. Check that the drawings you will receive include electrical layouts, plumbing points, and joinery details, not just pretty views. Our guide on how to choose an interior designer in Pune covers the questions in full, including the ones designers hope you will not ask.
First-time owners in the IT corridor, particularly around the township stock in Marunji, often run this stage over WhatsApp between work calls and then feel rushed into a decision. Give it a fortnight. It is the cheapest fortnight in the project.
Stage 5: Permissions and technical checks
Almost every housing society in Pune and Pimpri-Chinchwad controls interior work: a written application, an NOC, permitted working hours, a refundable deposit, restrictions on wet work and debris, and rules on which lift may be used. Get this moving as soon as you have possession, because it takes longer than owners expect and no amount of scheduling recovers a week lost to a committee meeting. The process, the deposit and the common conditions are covered in our society NOC guide.
Separately, anything touching structure, an opening in a wall you cannot identify, a change to a beam, a heavy load, a mezzanine, needs a qualified opinion rather than a carpenter's confidence. Our article on when you need a structural consultant explains where that line falls.
Stage 6: The design stage, and what has to be frozen
Design is not choosing a look. It is a sequence of freezes, and the order matters. Layout first: how you actually move, where you eat, where storage sits. Then services, electrical points, switch positions, plumbing, AC positions and drains, because these are cheap now and disruptive later. Then joinery: kitchen internals, wardrobe internals, storage volumes. Only then finishes and colour.
Ask for a walkthrough before you sign off. Seeing a kitchen in three dimensions catches the things a plan hides, a wall unit that blocks a window, a passage that is tighter than you thought. 3D visualisation explains what a good set of views should show and what they cannot tell you.
Freeze in writing. A signed drawing set and a specification, materials, brands, finishes, hardware, quantities, is what protects you when someone says "we always do it this way" in week six.
Stage 7: The material decisions that actually matter
You will be asked to choose more things than you expected. A handful genuinely affect how the home performs over ten years.
- Substrate. What goes behind the finish decides whether a kitchen base unit survives a leak. The trade-offs in Pune's humidity are set out in marine ply versus HDHMR.
- Shutter finish. Laminate, veneer, acrylic and PU behave very differently under fingerprints and cleaning; the finishes comparison covers where each belongs.
- Kitchen layout and counter. Start with the modular kitchen guide for layout and cost, and the countertop guide for a surface that takes Indian cooking.
- Wardrobe internals. Internal planning beats shutter design every time. The wardrobe guide covers running-foot pricing and what to specify.
- Ceilings. Do them where they carry light or conceal services, not everywhere. See false ceiling designs for living rooms.
- Hardware. Hinges, channels and sliding gear fail before anything else. This is the last place to save.
If vastu is part of your brief, raise it at layout stage rather than after joinery is drawn; the practical apartment-level view is in vastu tips for apartment interiors.
Stage 8: Site work, payments and the timeline
Once work begins, your job is to protect the decisions you already made. Attend the weekly review, keep every approval in writing, and insist on photographs before anything is covered up. Plumbing and electrical lines disappear behind tiles and boards, and the only record you will have is what was captured before closure.
Payments should follow milestones, not dates. A reasonable structure ties money to completed and inspected stages: a booking advance, a design and drawing fee, a mobilisation payment, then tranches against measurable progress on the site. Never pay ahead of work to "keep the pace up". If the pace depends on your next payment rather than a schedule, the problem is not cash flow.
Be clear on GST. Interior work in India attracts GST, and the rate depends on the nature of the contract. Ask for a tax invoice that separates material and labour, and do not accept a lump-sum cash arrangement that leaves you with no warranty and no recourse. Your agreement should also state how variations are priced, in writing, before the change is executed.
A typical 2 BHK fit-out runs eight to fourteen weeks of site work once drawings are frozen, assuming society permissions are in place. Delays come from three sources: pending decisions, material lead times, and society constraints. The first is entirely within your control.
Stage 9: Snagging, handover and warranty
Snagging is not a formality. It is a room-by-room, joint-by-joint inspection: every drawer and channel operated, every hinge aligned, every switch and socket tested, every tap and drain run, every edge and joint checked. Walk the site with the same seriousness you brought to possession, and put the snag list in writing with a deadline for closure.
Do not make the final payment before the snag list is closed and the warranty terms are in hand. Ask for the warranty in writing: how many years on modular joinery, on hardware, on finishes, on electrical and plumbing work, and who to call when something fails in year two. A studio that offers post-handover support will say so in the agreement, not just in conversation.
Also collect what you will need later: as-built drawings, the specification sheet, warranty cards, and contact details for the trades. All of it takes ten minutes to hand over and saves days when you need to drill a wall in two years.
Where to start
If you are at the beginning, do the unglamorous parts first. Inspect at possession. Set the budget before the mood board. Get the society NOC moving. Freeze layout and services in writing. Then choose the partner who can hold all of it together.
At Gruham Buildsol, we have spent fifteen years bridging the gap between visionary interior design and structural integrity in Pune. Our turnkey approach is built for first-time owners who want a single point of accountability, clear financial planning, and engineered timelines from discovery to handover. If you are starting your first project, book a discovery session with us and let's build it right, stage by stage.